"Campaigns Introduction": content can be edited for a specific campaign and presented at a specific time, and its content will be directly overlaid on the originally set device content
1. Click "Control Center"
2. Click "Shop": Add shops and pair devices to device groups
3. Click "Setting": Enter the list of devices connected to the store
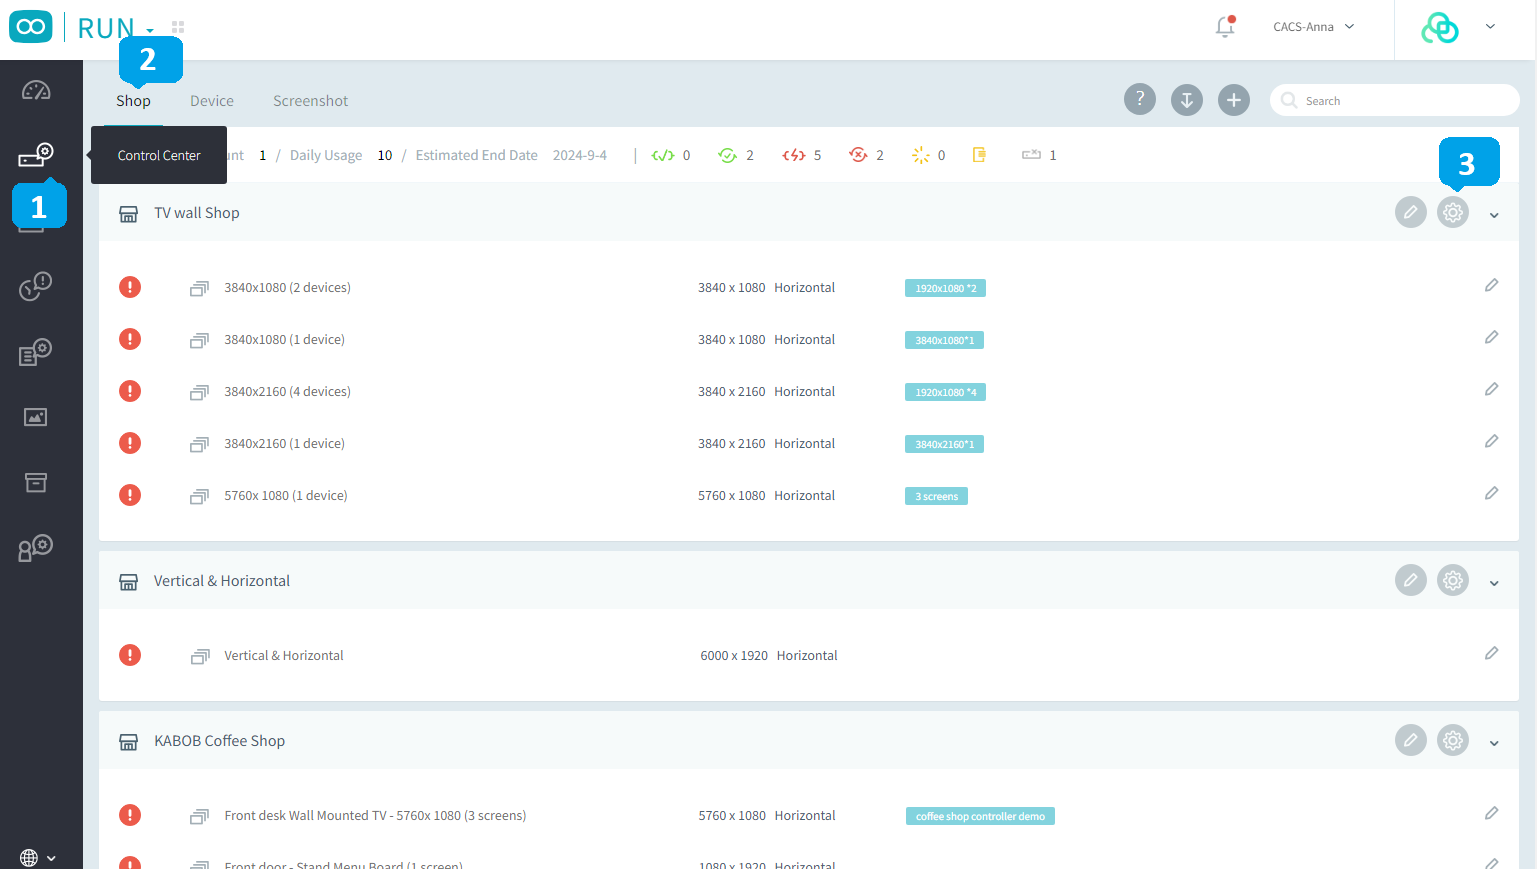
1. Click "+"
2. Select "New Screen": Need to add a screen matching the size of the content
3. Click the icon to pair the device, and the name of the device will be displayed on the left side of the icon
※After setting, you need to click "Apply" to enter the editing content

Set Content Templates
1. Click "Campaigns"
2. Click "Content Templates"
3. Click "+": Add content to template, and enter the template setting
※After the editing of this content template is completed, it will be updated to each campaign synchronously, and there is no need to change the content in the campaign
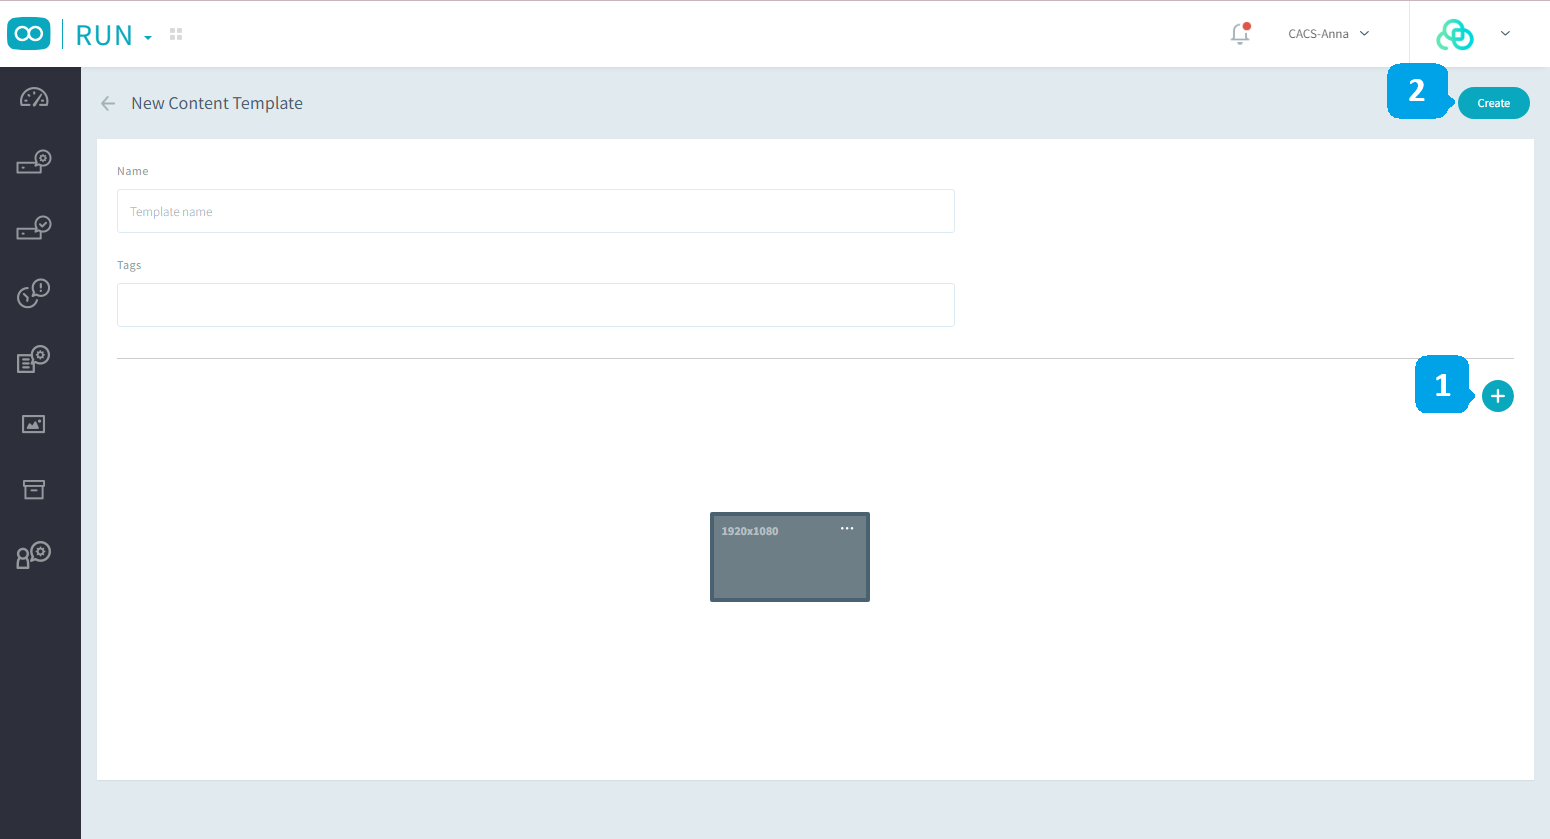
After entering the "Add Content Template" page
1. Click "+": the size of the template needs to be set according to the screen size
2. Click "Create ": you can add the content template
"Add screen": fill in the position and size
■ X: Indicates rendering from the left position 1920
■ Y: Indicates rendering starts at top position 0
■ Width: Indicates that the width is 1920
■ Height: Indicates the height is 1080
Click "Save" to store
Set up Campaign
1. Click "Campaigns"
2. Go to the "Campaigns" page
3. Click "+" to add an Campaign
Enter the "Add Campaign" window, fill in the relevant information, and then click "Save Campaign"
Click "Device Pairing" in the "..." of the campaign to check the matching size of the device
Select the device and click "Apply" to save the device
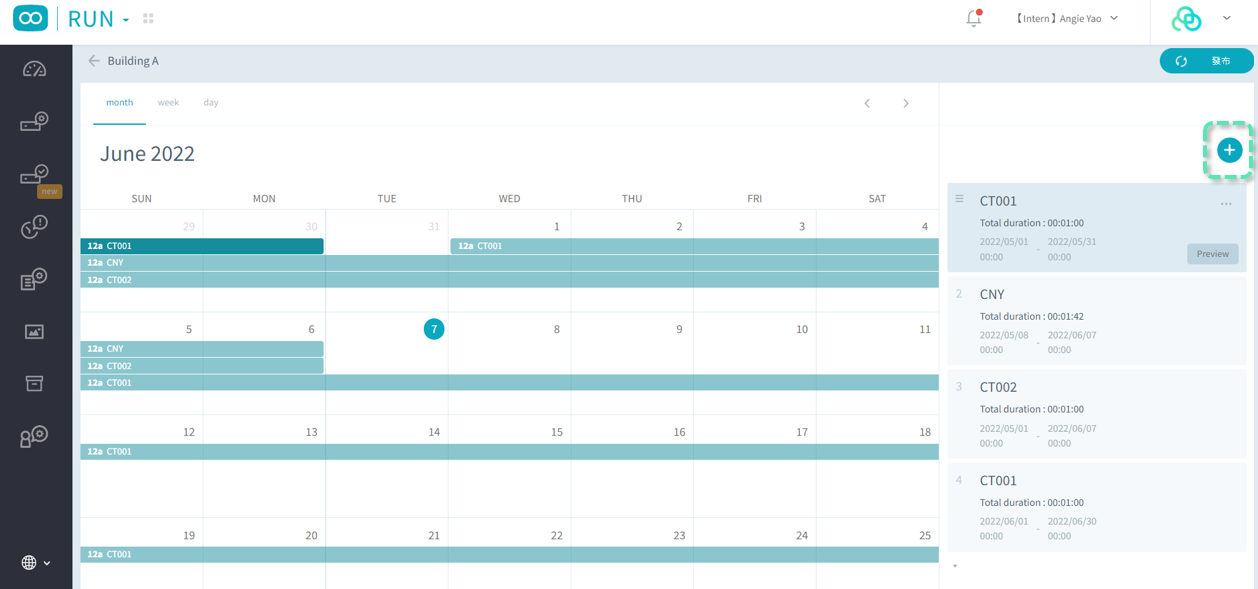
Click on the name of the campaign you want to edit: you can enter the page for editing the campaign
Click "+": You can add a content template to the campaign
- The rightmost column shows the playback order of content templates from top to bottom and uses this as a loop to play content
-The playback order can be changed by dragging
"Select Content Template": Content templates can only be selected based on the size set by the shop device
Click "Save" to complete the setting

1. Click the "..." of the content template you want to edit
2. Click "Edit" 
"Edit"
1. "Every Week": You can set different time periods to be played each day
1.1 "Every day": You can set the same time period to be played every day in turn
2. "Repeat time": the number of times the template content is to be played
3. "Valid period": the period during which the sample content is to be played
4. Click "Done" to save the editing of the time period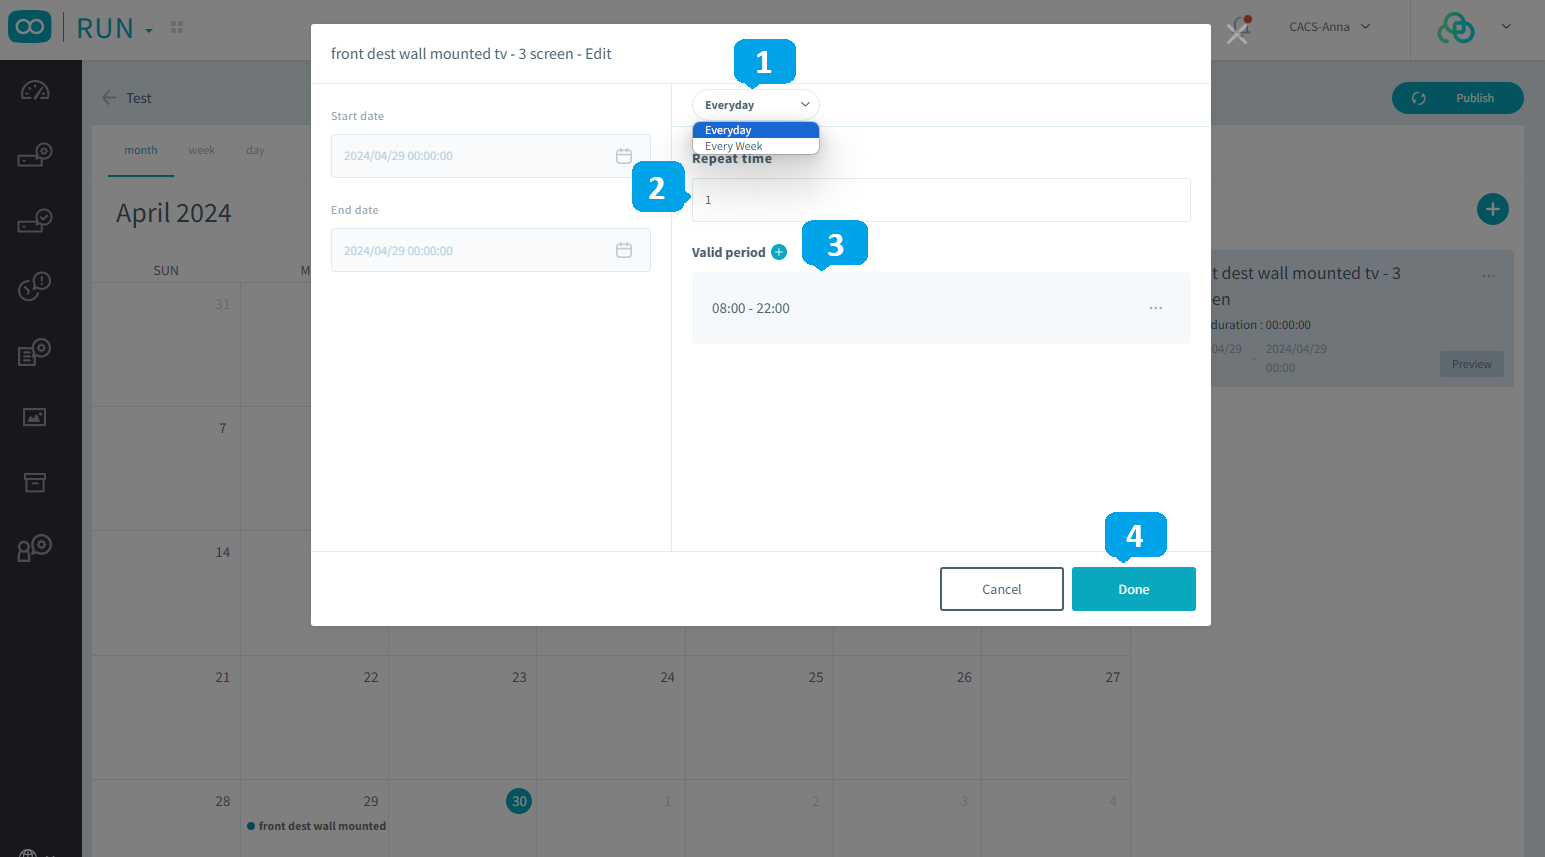
1. After editing, click "Publish"
2. Select the "Reviewer" to review and click "Save"

Campaign Approval
1. Click "Campaign"
2. Click "Approval"
Enter the approval page to view the activities to be reviewed

- Enter the approval page to check whether the content is correct, but cannot edit it
● After checking, you can click "Review Reject" or "Approve"
● After approval, the content of the event will be played on the date and time set for the campaign
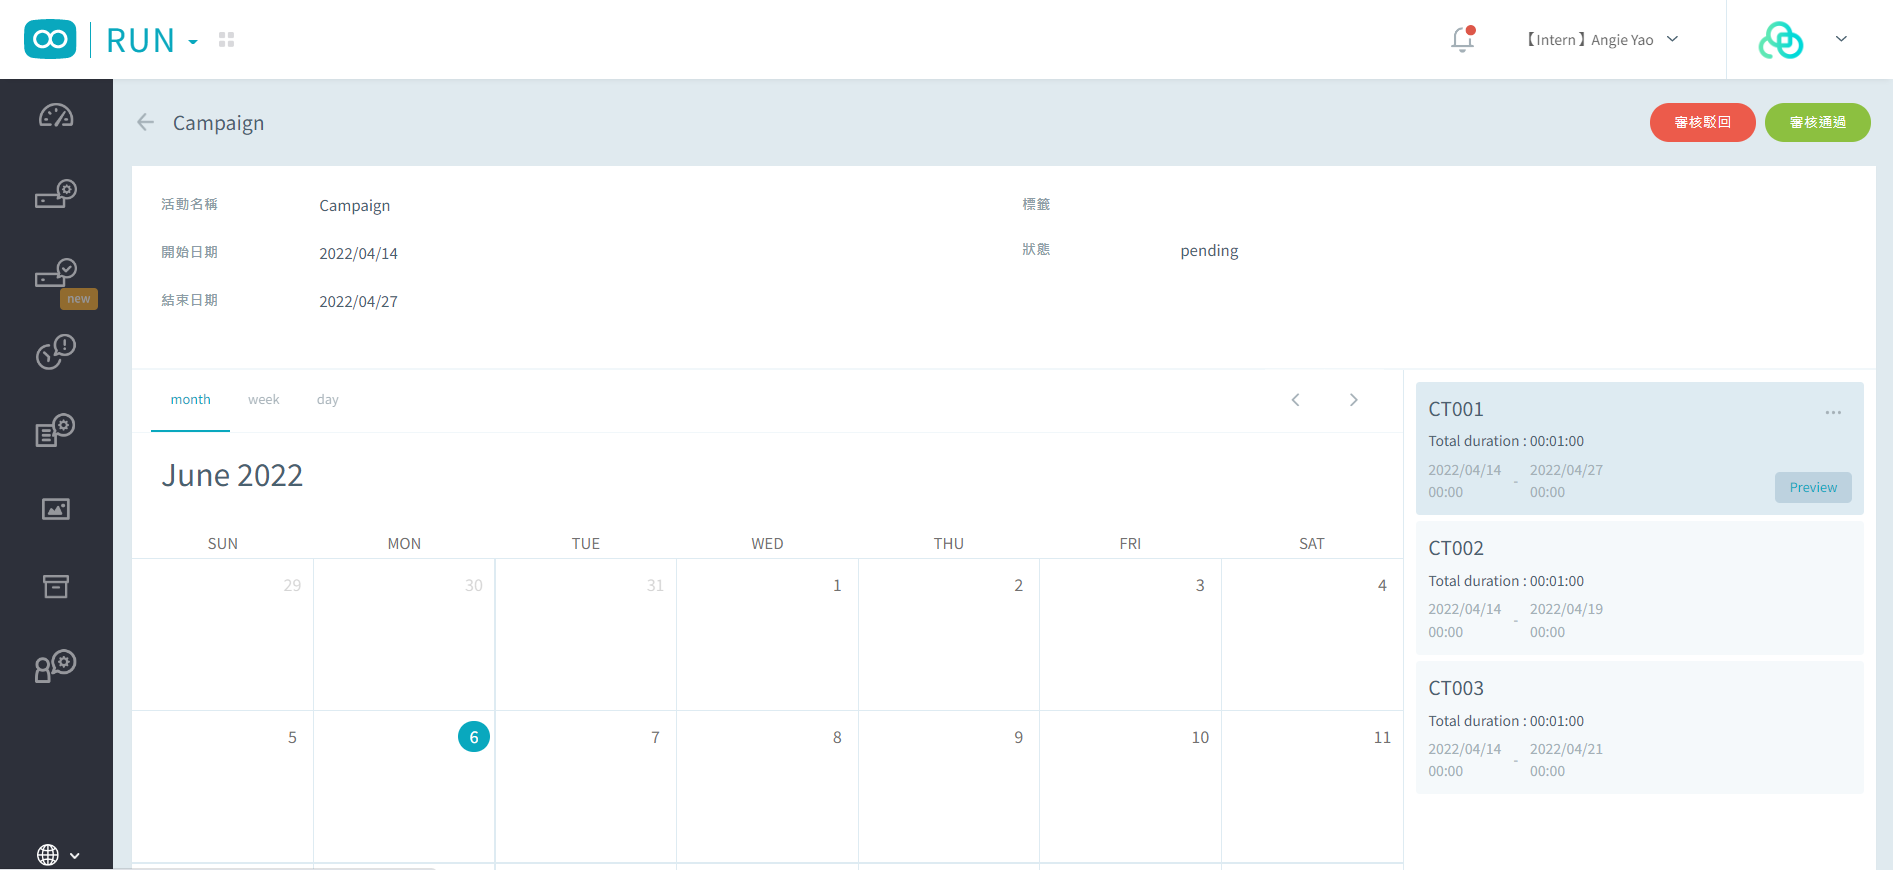
※If there are multiple campaign times that overlap, they will be presented in a carousel


