Kabob Cloud Function permission settings
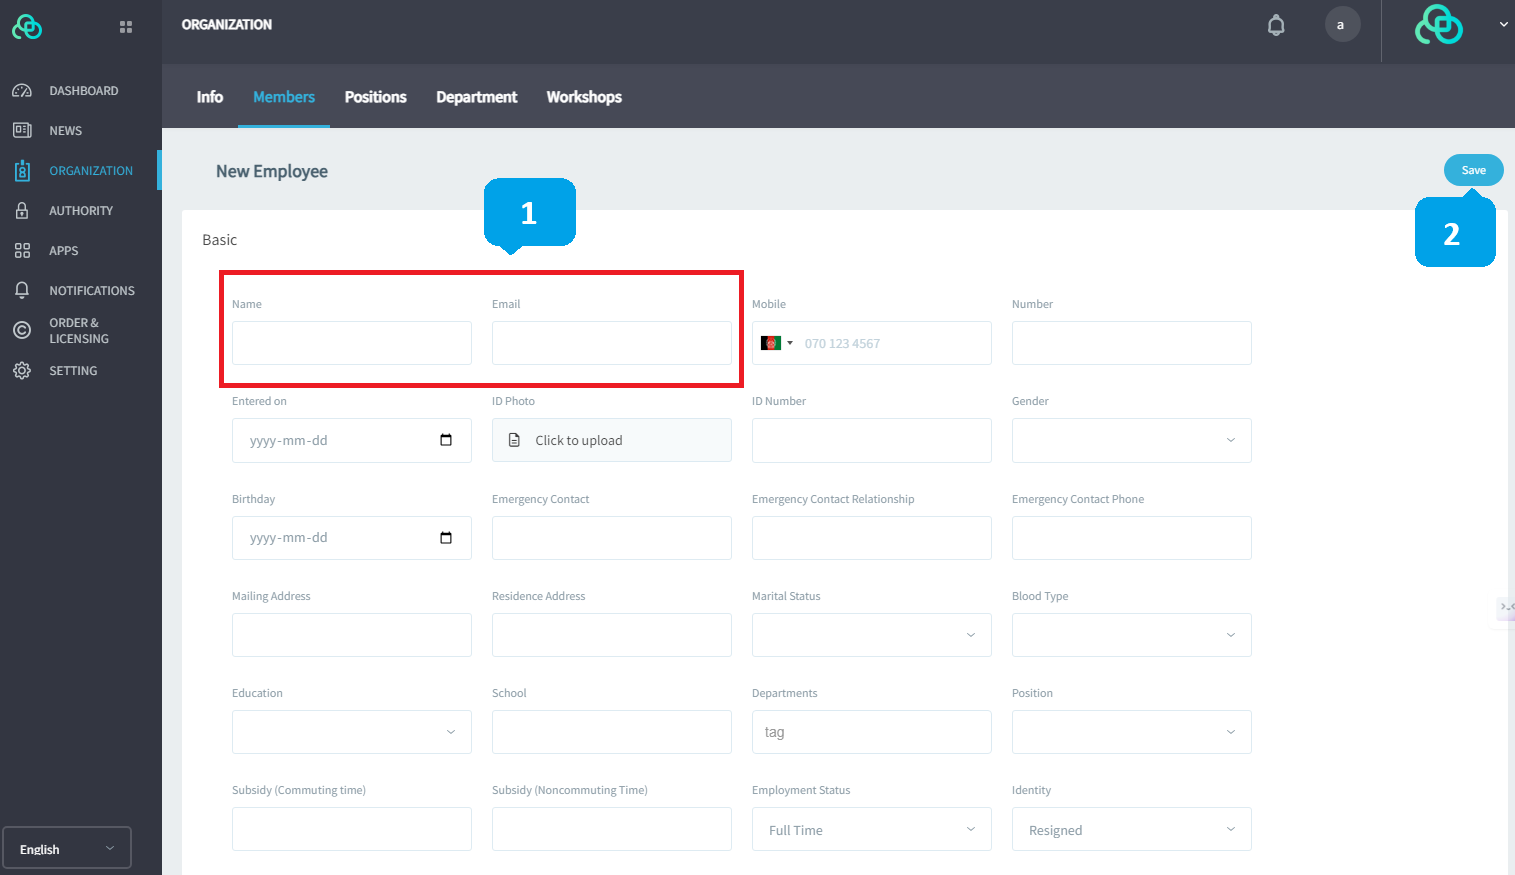
Add New Members
1. Click "Organization"
2. Click "Member": Enter the member list of that organization
3. Click "+": Add new members

1. Required "Name, Email Address": Enter the name and email address that the member will use in the organization.
2. Click "Save": Save the content
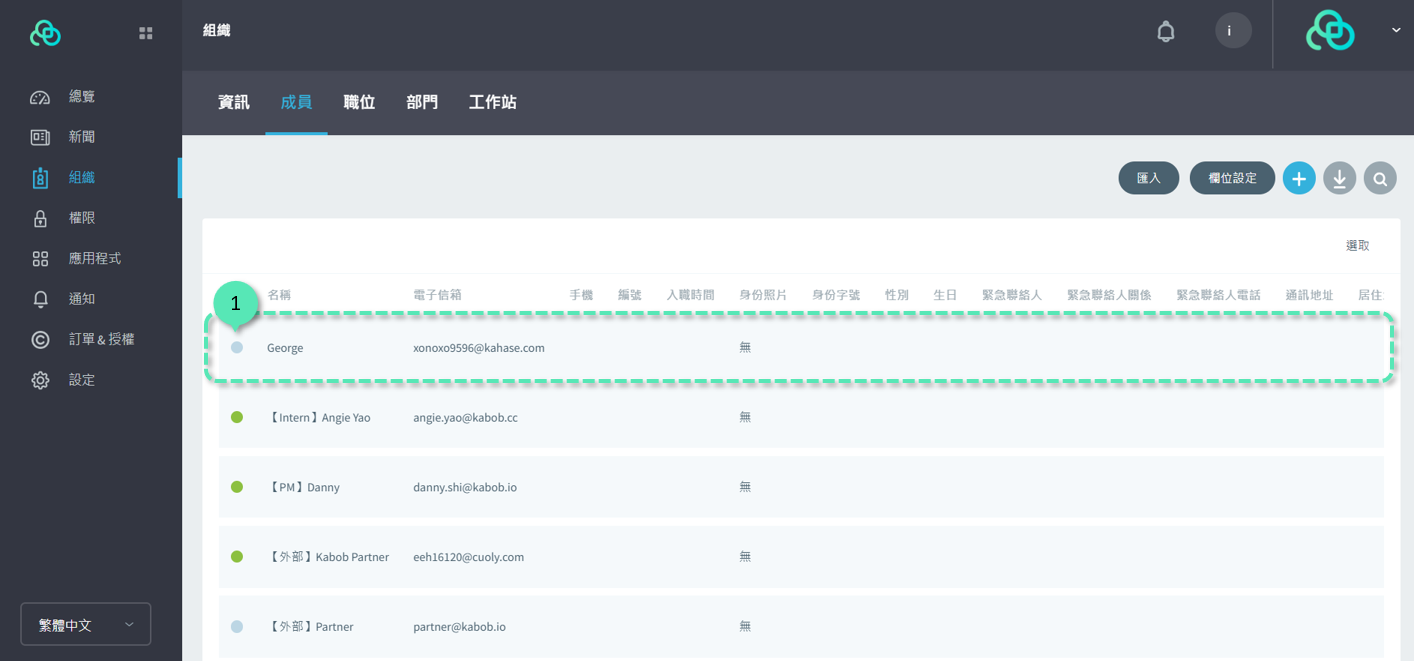
1. A gray circular icon means that the member has not yet verified their email address


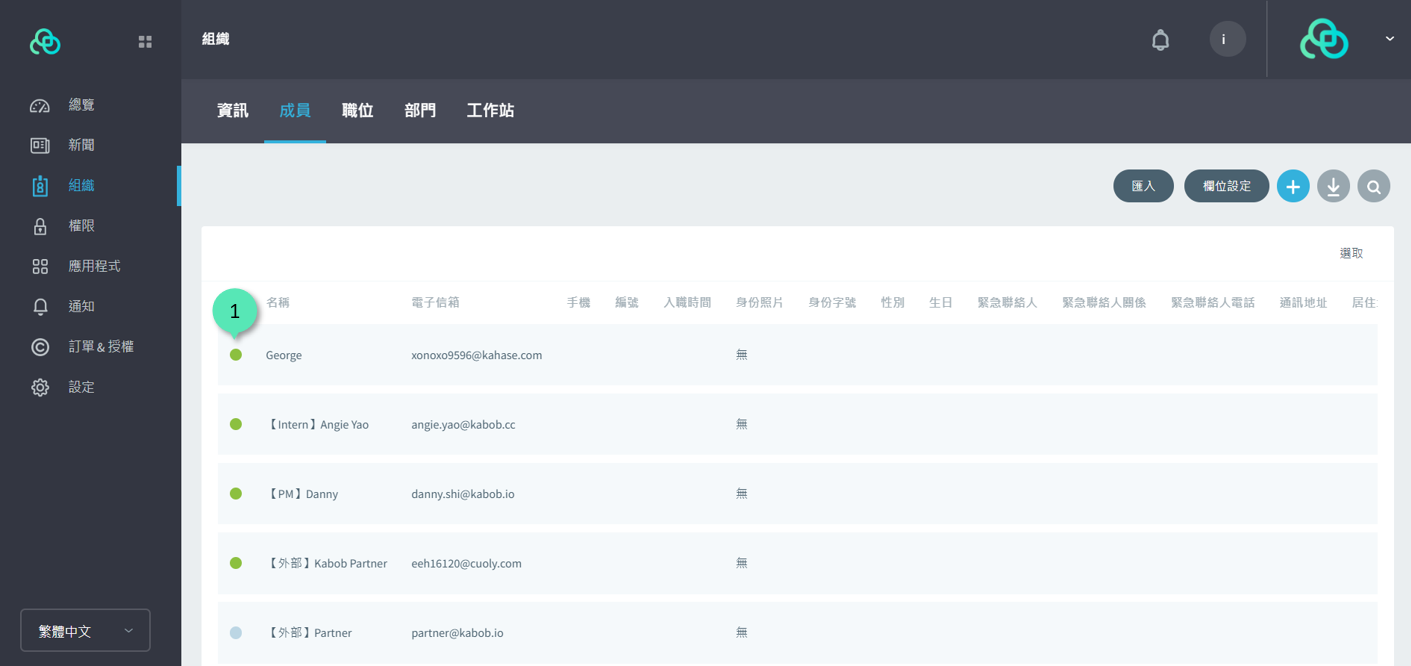
The green circular icon indicates that the member has verified their email address
Kabob Cloud Function permission settings
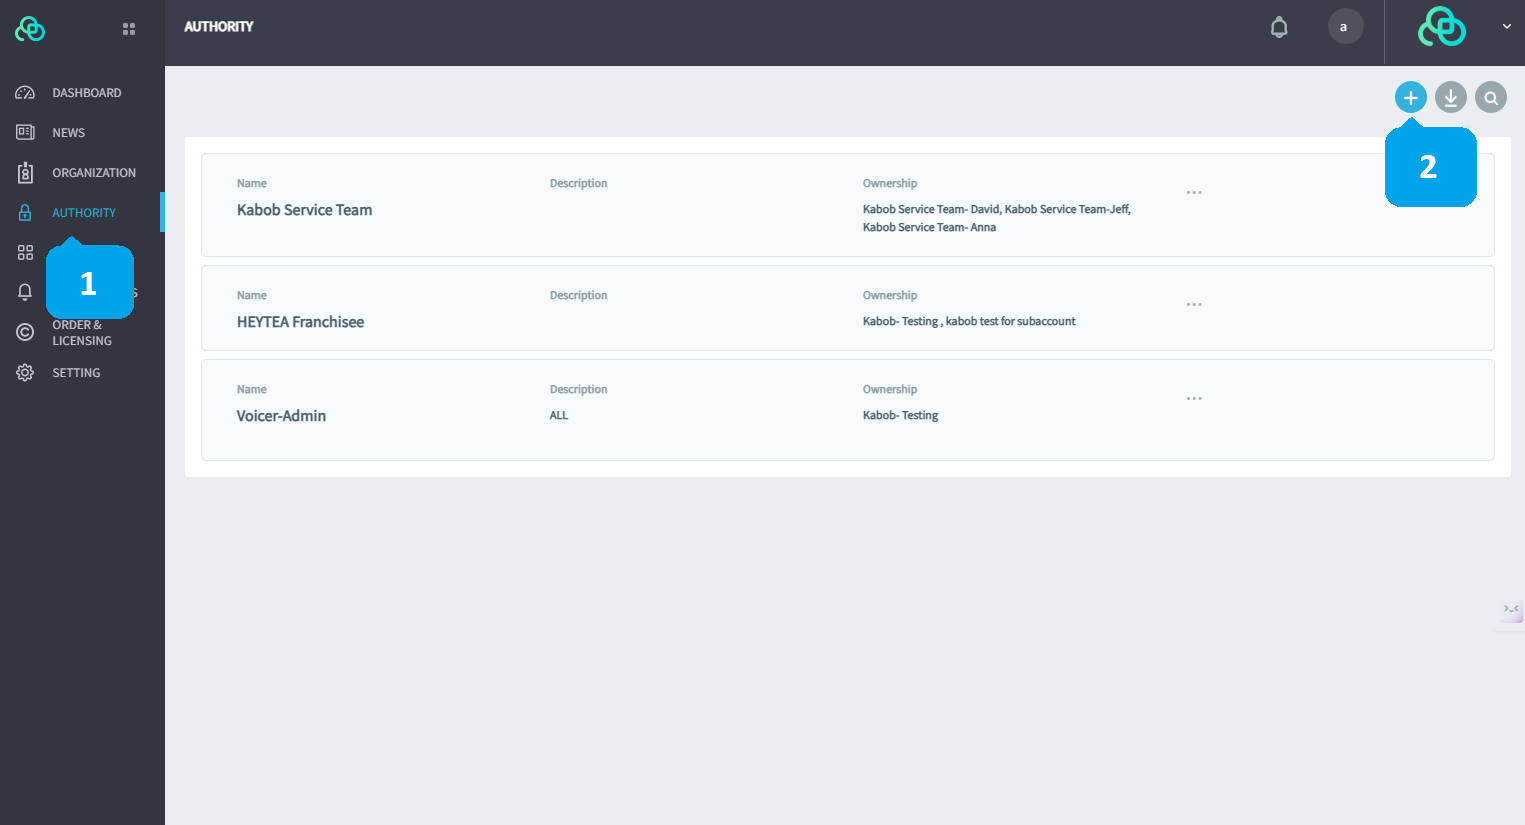
Add & Edit Permission Names and Owners
1. Click "AUTHORITY": enter all permission pages
2. Click "+": add permission
1. "Name": Enter the name of the permission
2. "Description": Enter a description for the permission
3. Click "Save"

1. "Edit": edit the name and description of this permission
2. "Permission": Authorize the function of the application for this permission. If you select a specific application, you can
authorize the function of the program
3. "Ownership": You can choose the owner of this permission for a specific organization, position, or employee
4. "Delete": delete the permission
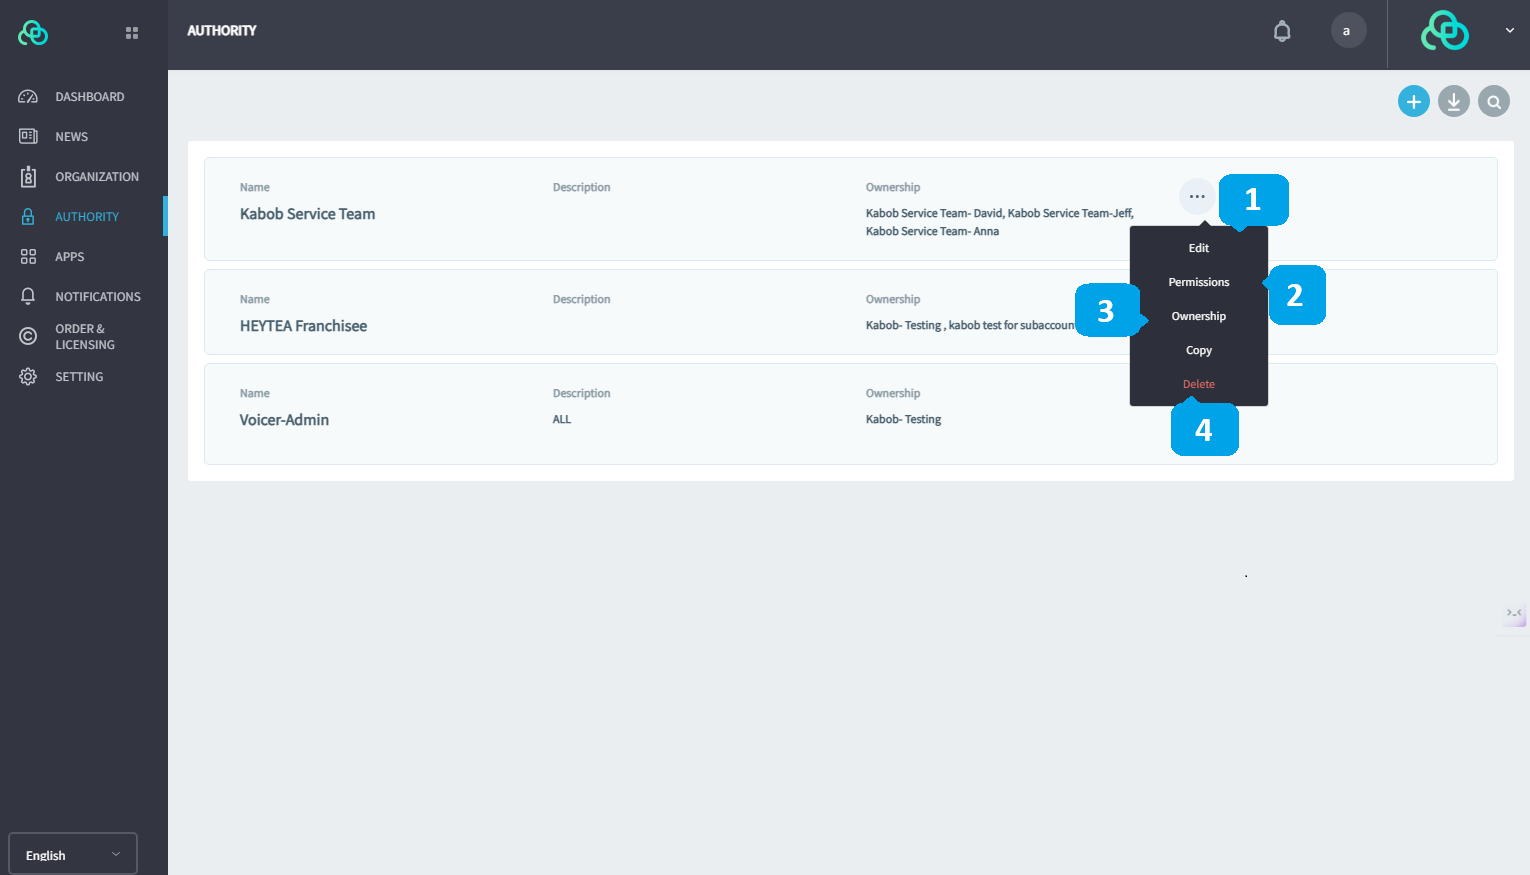
Kabob Cloud Function Permission Settings
Permission Description (Full Functions / Devices / Templates / Media Library / Events)
Full Functions-All
Indicates that the editor owner can use all functions of Lookr
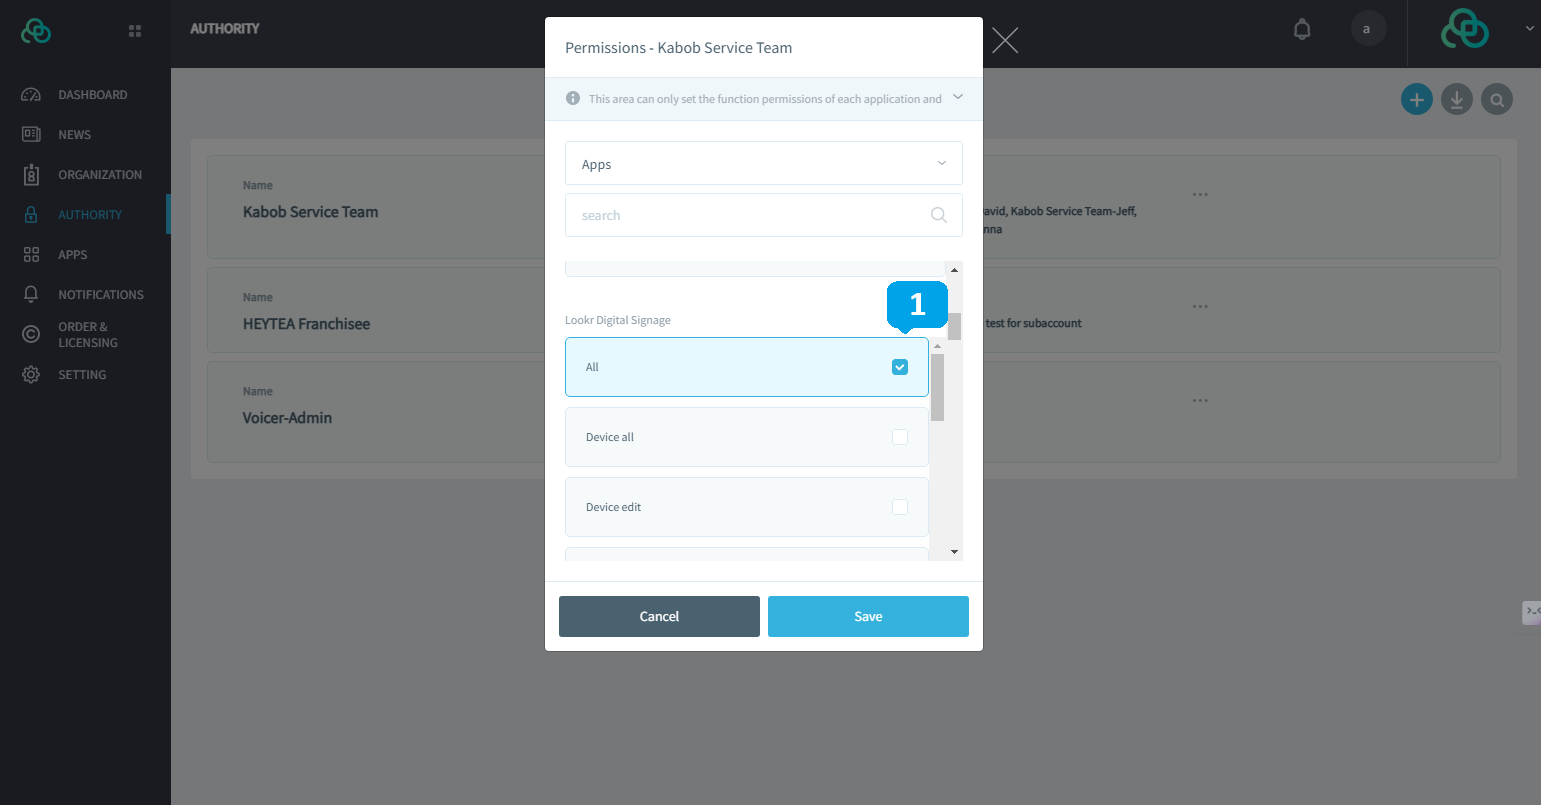
Device Function
1. "Device All": including editing, viewing, and activation of the device
2. "Device Edit": Edit device information and content
3. "Device View": You can view device information and content
4. "Device activation": The device can be activated
5. Click "Save" to save the content with editing permissions

Template Function
1. "Template All": including editing and viewing of templates
2. "Template Edit": You can edit and publish template content
3. "Template View": Only template content can be viewed, but cannot be published.
Click "Save" to save the content of the edit permission

Media Library Function
1. "Media All": including editing and viewing of media library
2. "Media Edit": edit the contents of the media library
3. "Media View": You can only view the contents of the media library, but cannot edit it.
Click "Save" to save the content of the edit permission

Campaigns Function
1. "Campaign All": including editing, viewing, and auditing of Campaigns
2. "Campaign Editing": You can edit the campaign content
3. "Campaign View": You can only view the campaign content, but cannot edit it.
4. "Campaign Media Report View": You can view the Campaigns media report in the dashboard
5. "Campaign Review": You can specify the reviewer of the Campaigns
Click "Save" to save the content with editing permissions
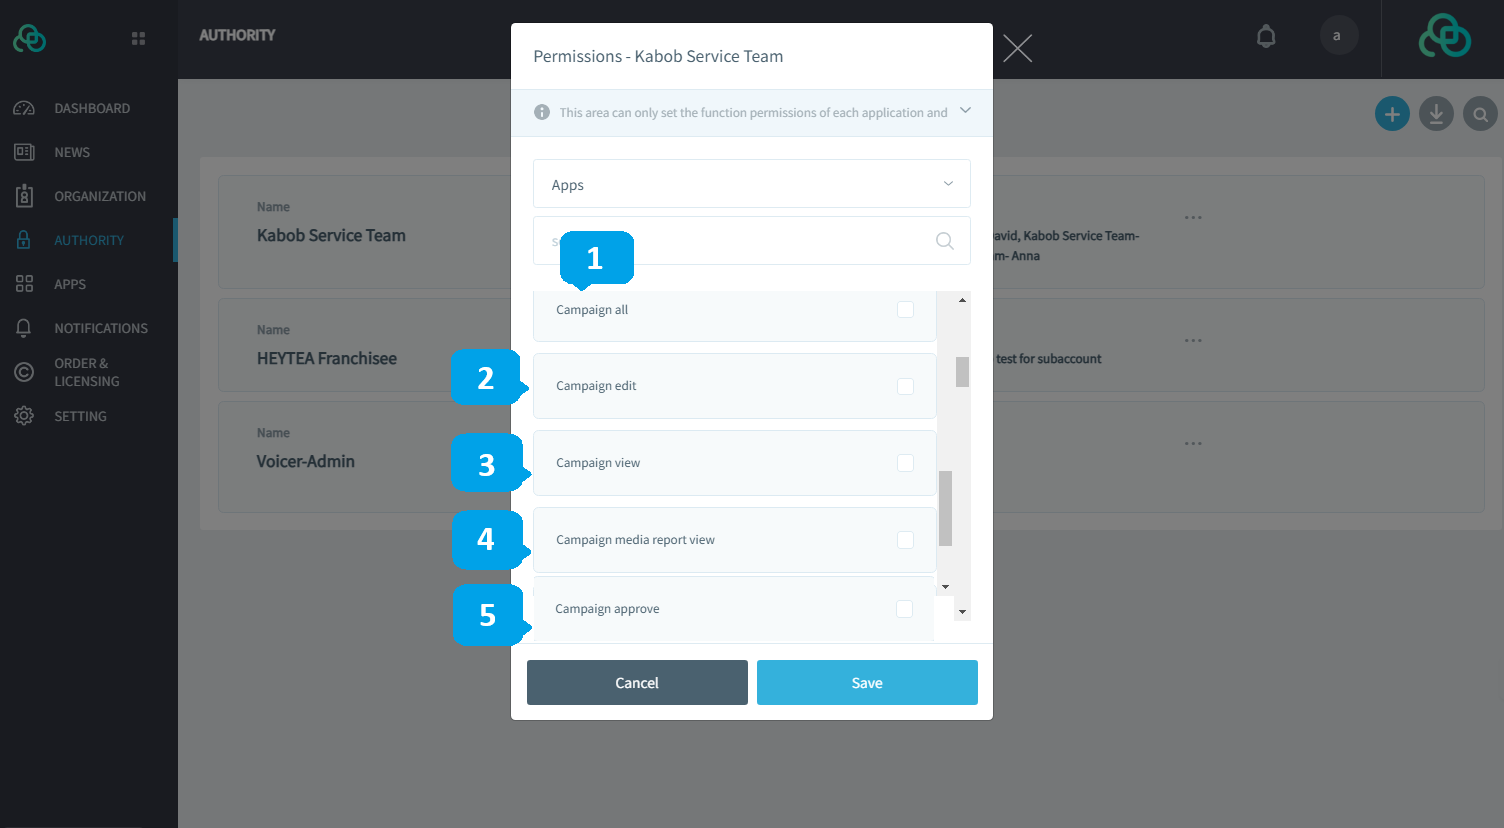
Lookr Content Permission Setting
Device Function Permission Setting
1. Click "Control Center"
2. Click "Device": Enter the device list
3. Click "..."
4. Click "Permissions"

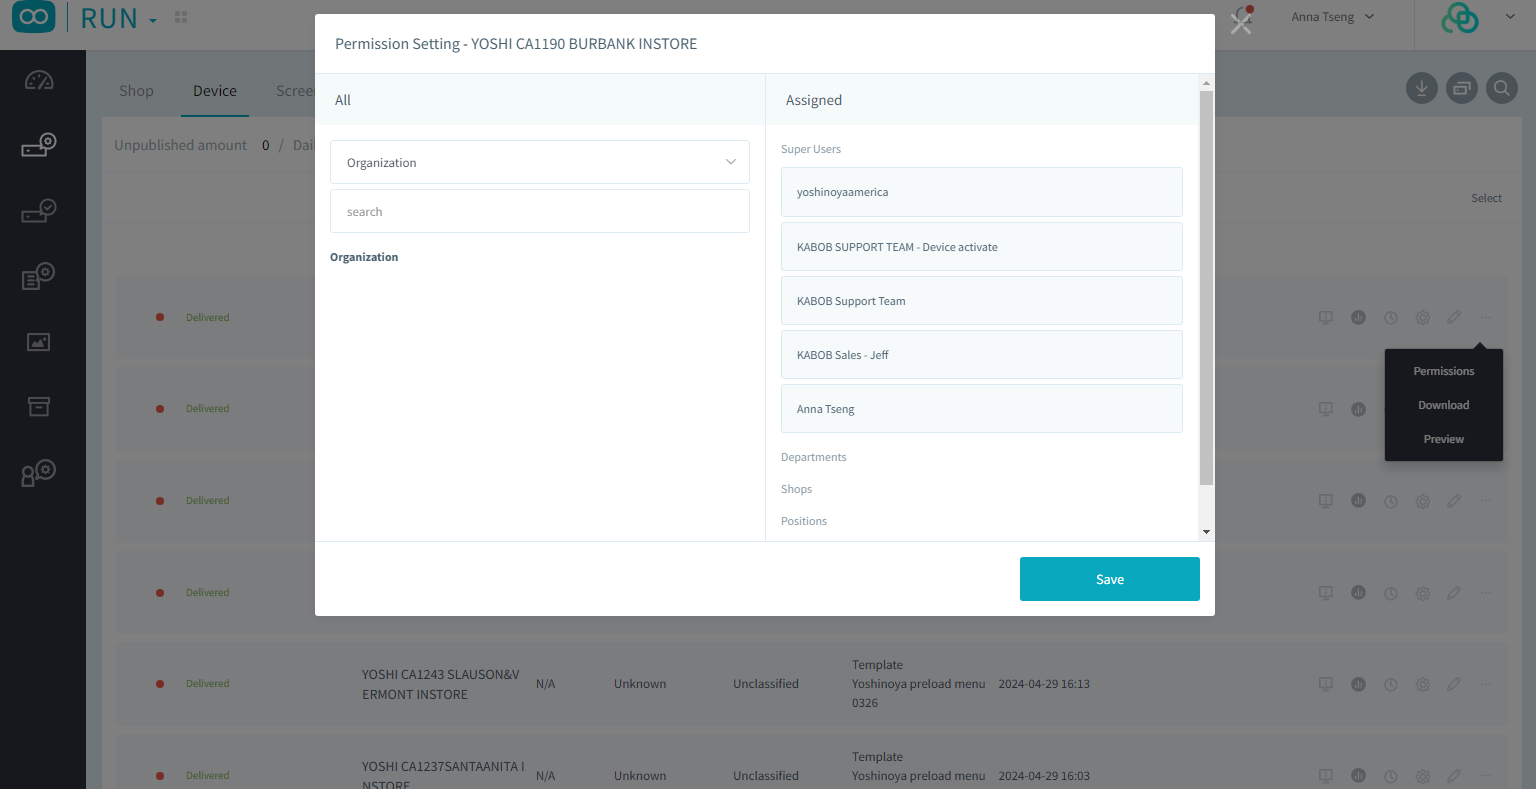
Templates Permission Setting
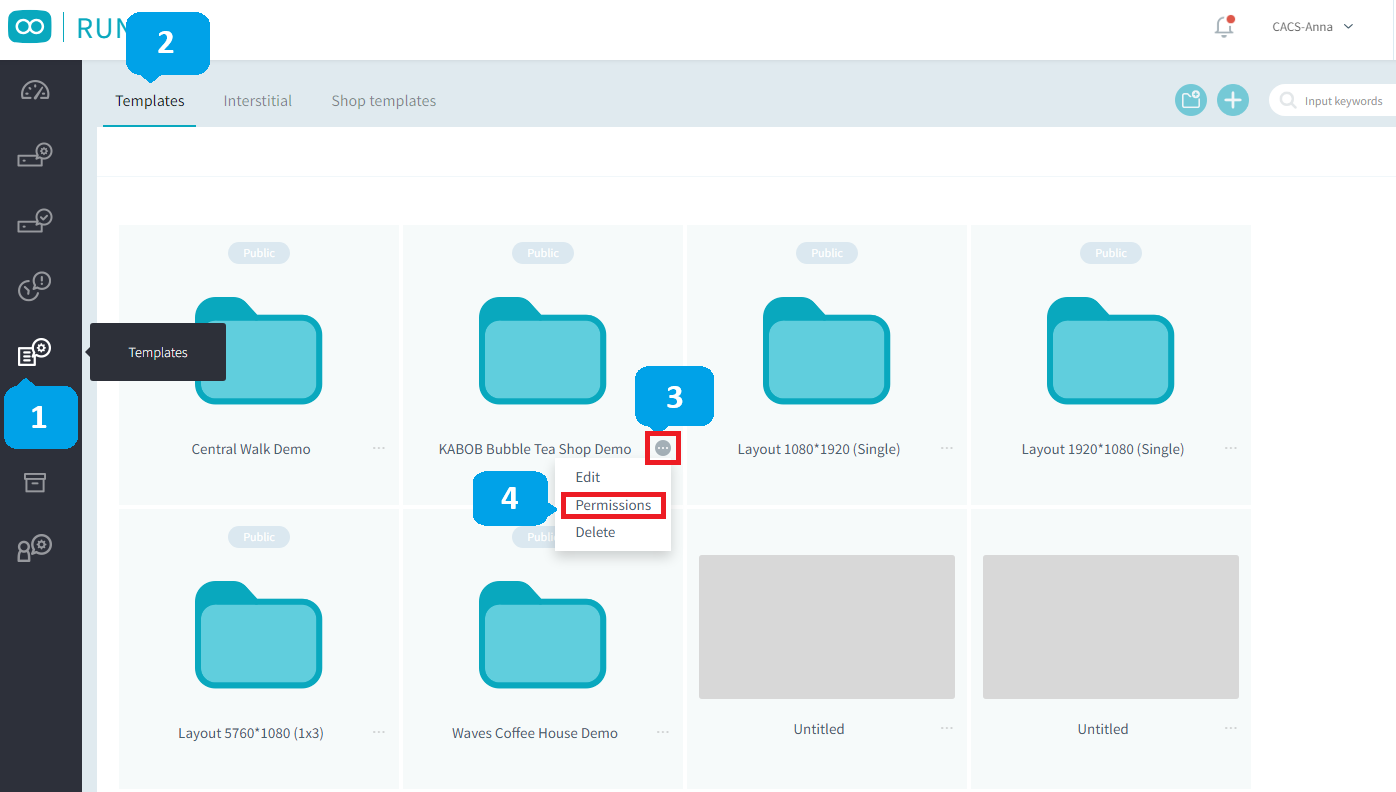
1. Click "Templates" on the left column
2. Click "Templates"
3. Click "..." of the folder that you want to edit permissions
4. Click "Permissions"

Media Management Permission Setting
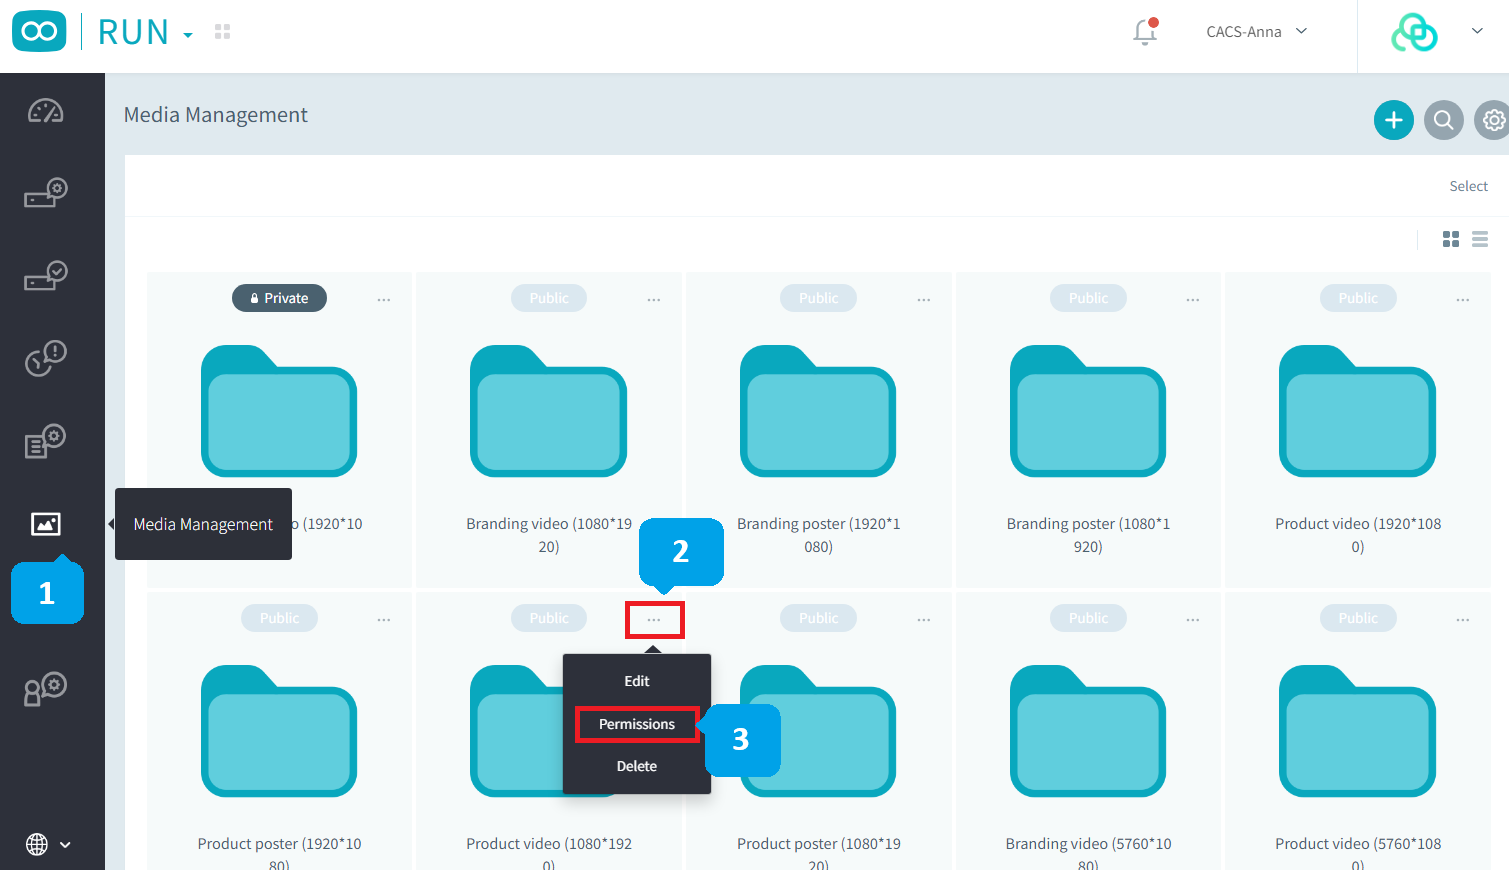
1. Click "Media Management" of the left column
2. Click "..." of the folder that you want to edit permissions
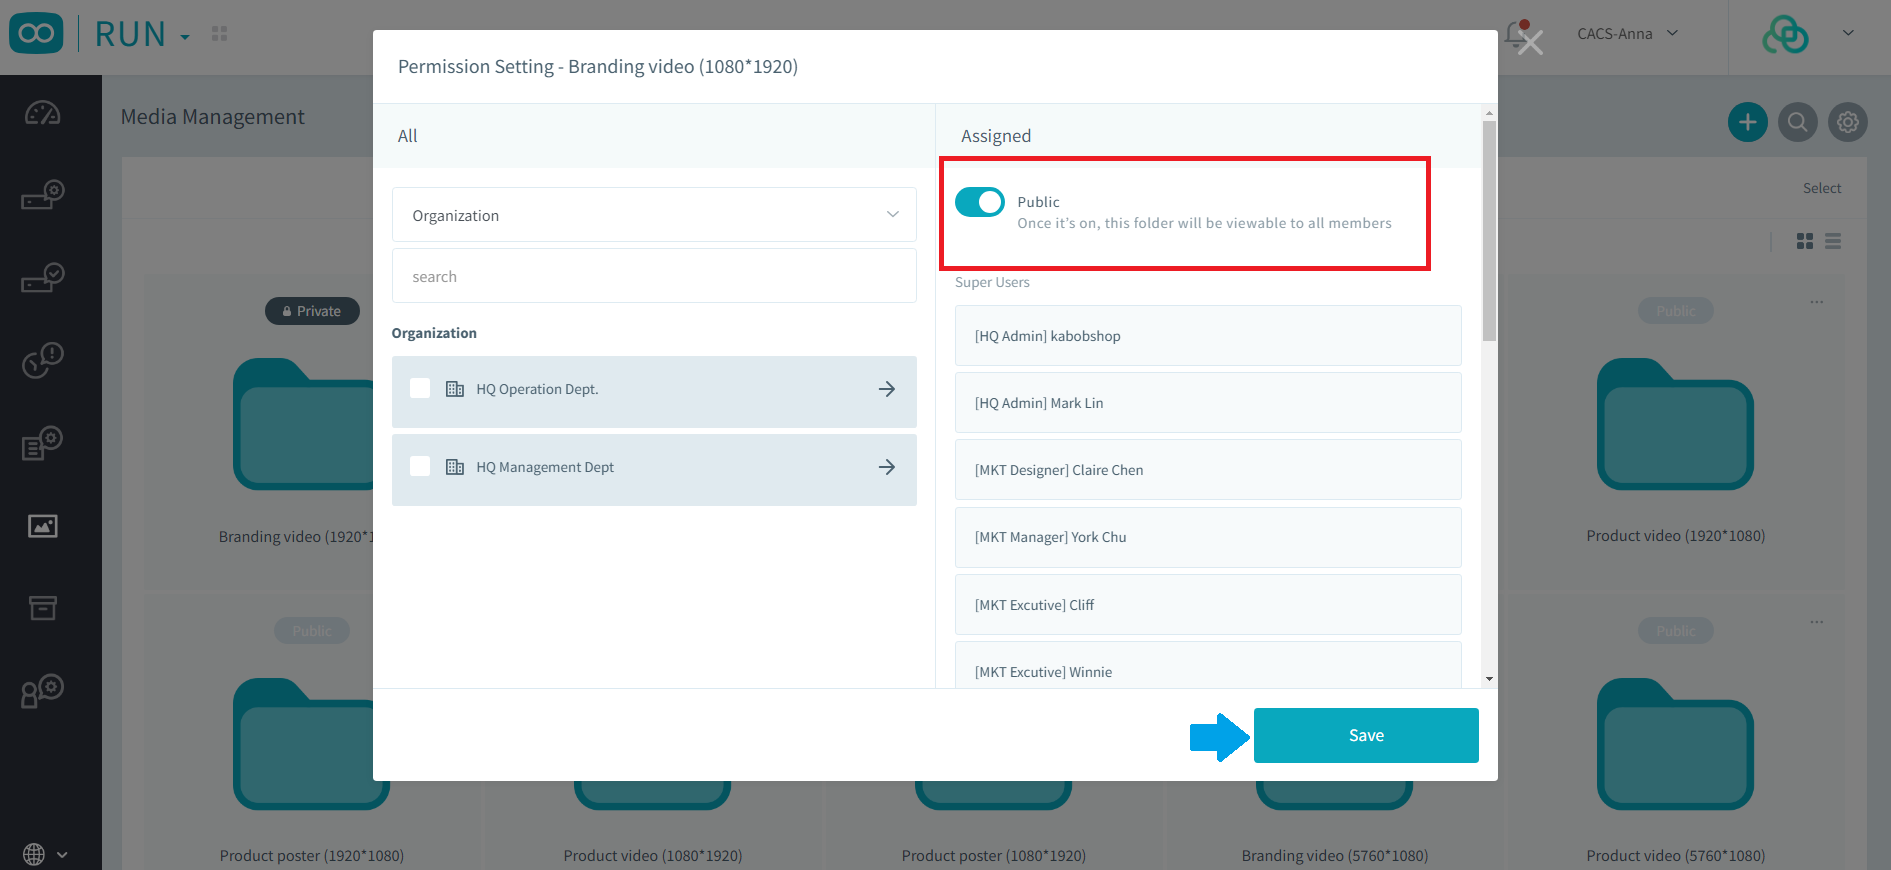
3. Click "Permissions"

Campaigns
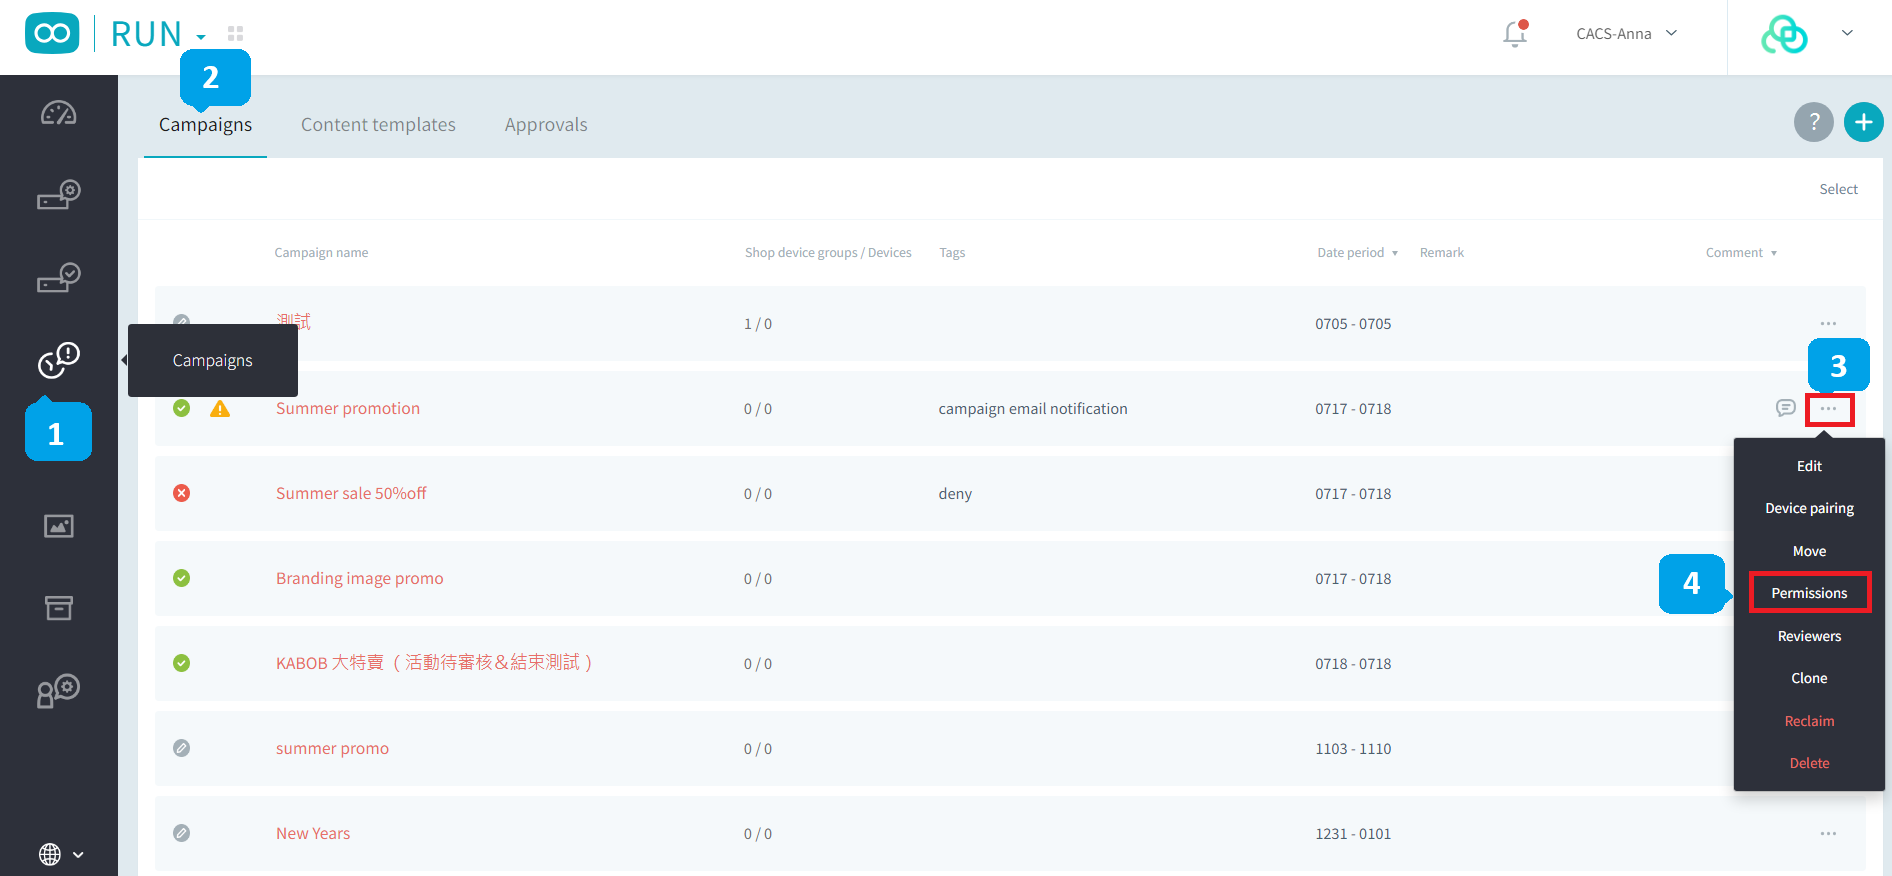
1. Click "Campaigns" of the left column
2. Click "Campaigns"
3. Click "..." of the folder that you want to edit permissions
4. Click "Permissions"
Was this article helpful?
That’s Great!
Thank you for your feedback
Sorry! We couldn't be helpful
Thank you for your feedback
Feedback sent
We appreciate your effort and will try to fix the article