UMD1-81 Multi-Screen - Device Set Setup & Shop Edit

Modified on Fri, 26 Apr at 7:48 PM

"Shop device group setting": It can classify several devices managed by different shops, and then quickly manage several devices in the shop


1. Click "Control Center": Enter the control page of stores, devices, and screenshot overview


2. Click "Store": This page displays all the devices used in different shops


3. Click "+": After filling in the relevant information of the shop, click Save to add a new shop


After adding a shop, fill in the relevant information and click "Save" to complete the new shop


Edit Store:


Click on the edit on the Store you want to edit


Fill in or modify the information of the shop, and click "Save" after completion to save the data


Shop Editing: Set and edit the content of the shop template


Click on Setting


1. Click "Edit Content": One-time content selection and editing for each screen


2. Click "+": You can choose to "New screen" or "Load from default layout"


3. Click "...": "Edit" and "Delete" the screen
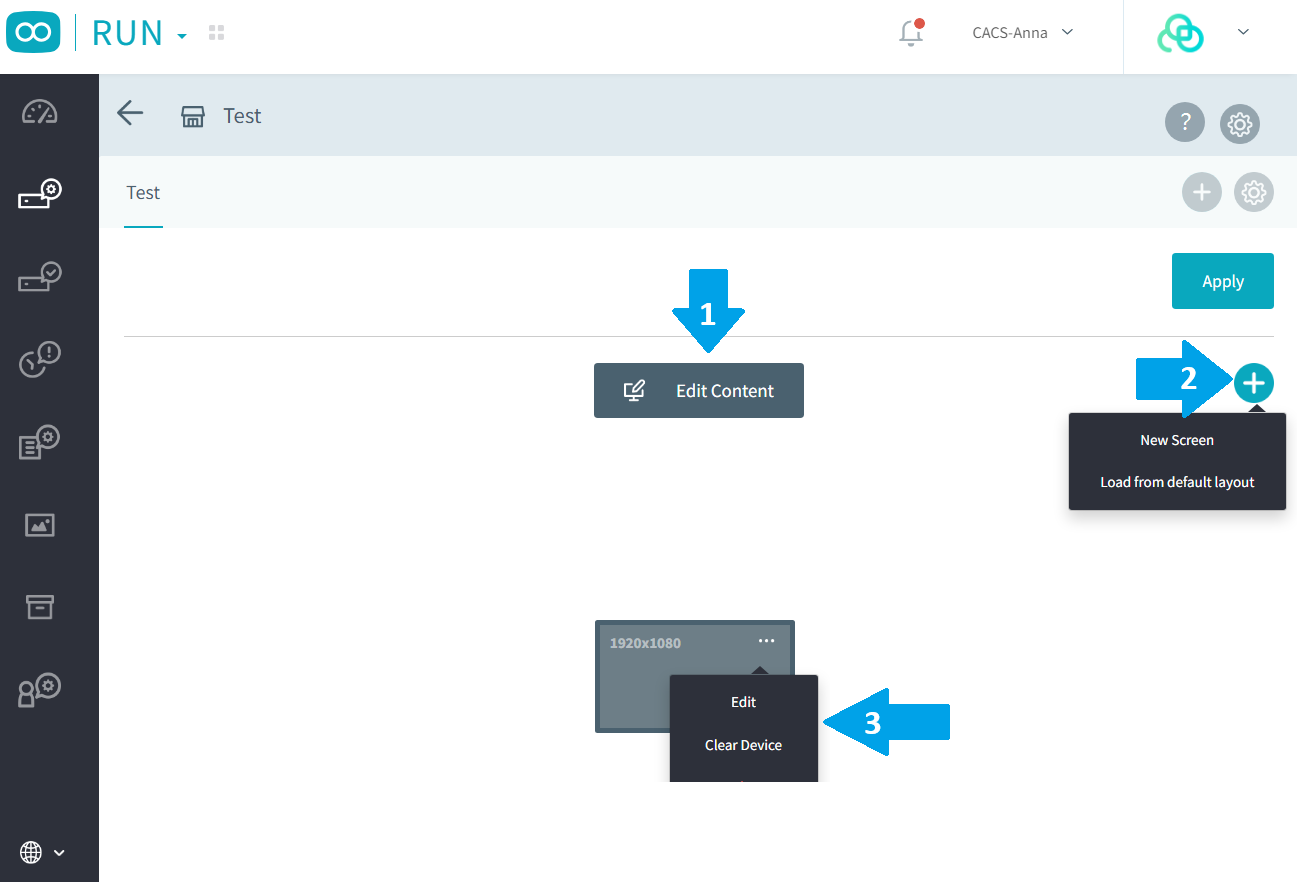


If you want to set the screen size and orientation by yourself, you can click "+" and then click "New Screen" to set


* Positions


     - X: For representations that start rendering at position 960 from the left


     - Y: Indicates rendering starts at top position 0


* Size: the default size is as follows but can also be adjusted by yourself


     - Width: Indicates that the width is 1920


     - Height: Indicates that the height is1080
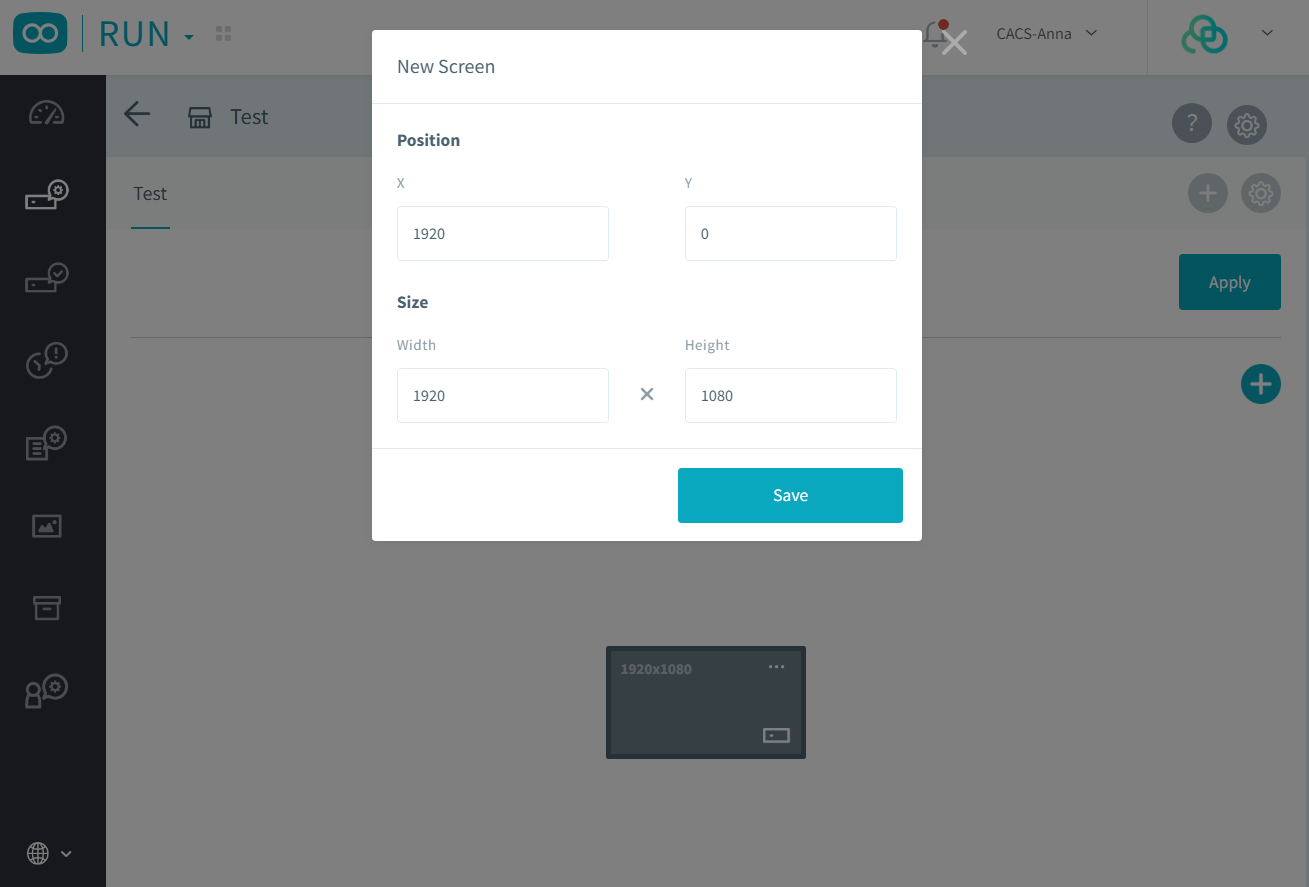
Click "Save" after setting


If you want to use the default, you can click "+" and then click "Load from default layout" to set
※At this time, a box pops up to indicate that if the default version is used, the original template content will be cleared, and the size can be selected after clicking "OK"


"Select size": Select the required size according to the number of screens of the store model, that is, the display method


- Horizontal: The screen is placed in landscape orientation


- Vertical: The screen is placed in portrait orientation

After setting, click "Save"


Click the icon shown below to perform device pairing for this screen


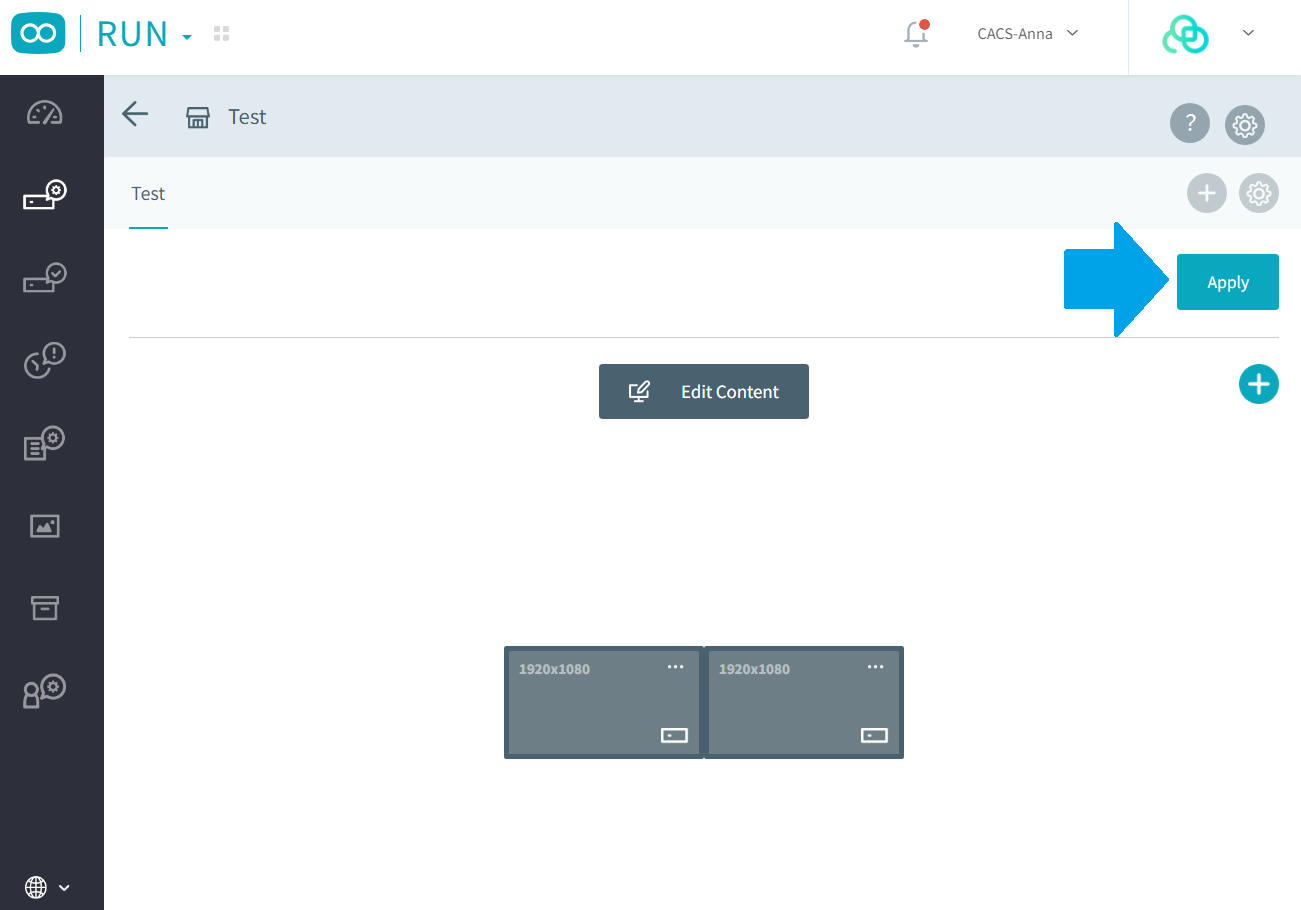
After selecting the desired layout, the following picture will appear, and then click "Apply"


Was this article helpful?

That’s Great!

Thank you for your feedback

Sorry! We couldn't be helpful

Thank you for your feedback

Let us know how can we improve this article!

Select at least one of the reasons

Feedback sent

We appreciate your effort and will try to fix the article