Learning Tips
● How to set up a pro player with multiple screens
● How to install Lookr and activate a pro player
● How to create a template for multi-screen and dispatch the content
Multi-screen effect demonstration of Pro Player

1. Device Set Up
STEP 1.
Connect HDMI outputs
For each screen, connect its HDMI cable to the Kabob Pro Player box.

STEP 2.
Setting Multi-screen Display
1.2.1 Display software setup (AMD Radeon)
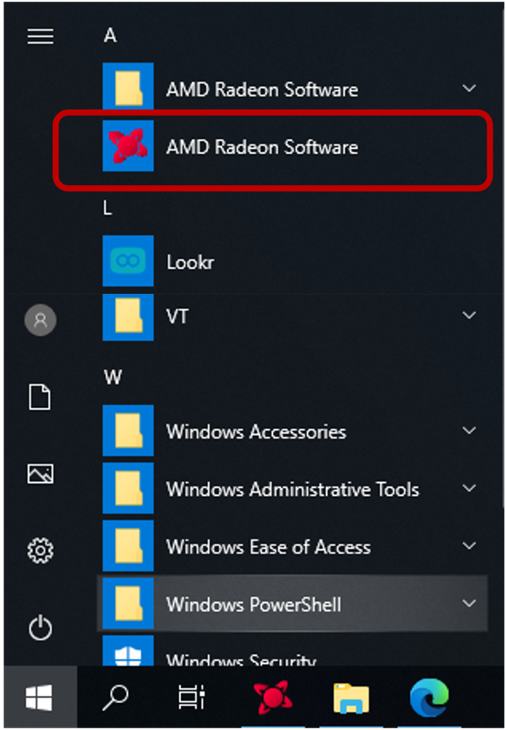
a. Find the AMD Radeon Software in Windows Programs and execute.


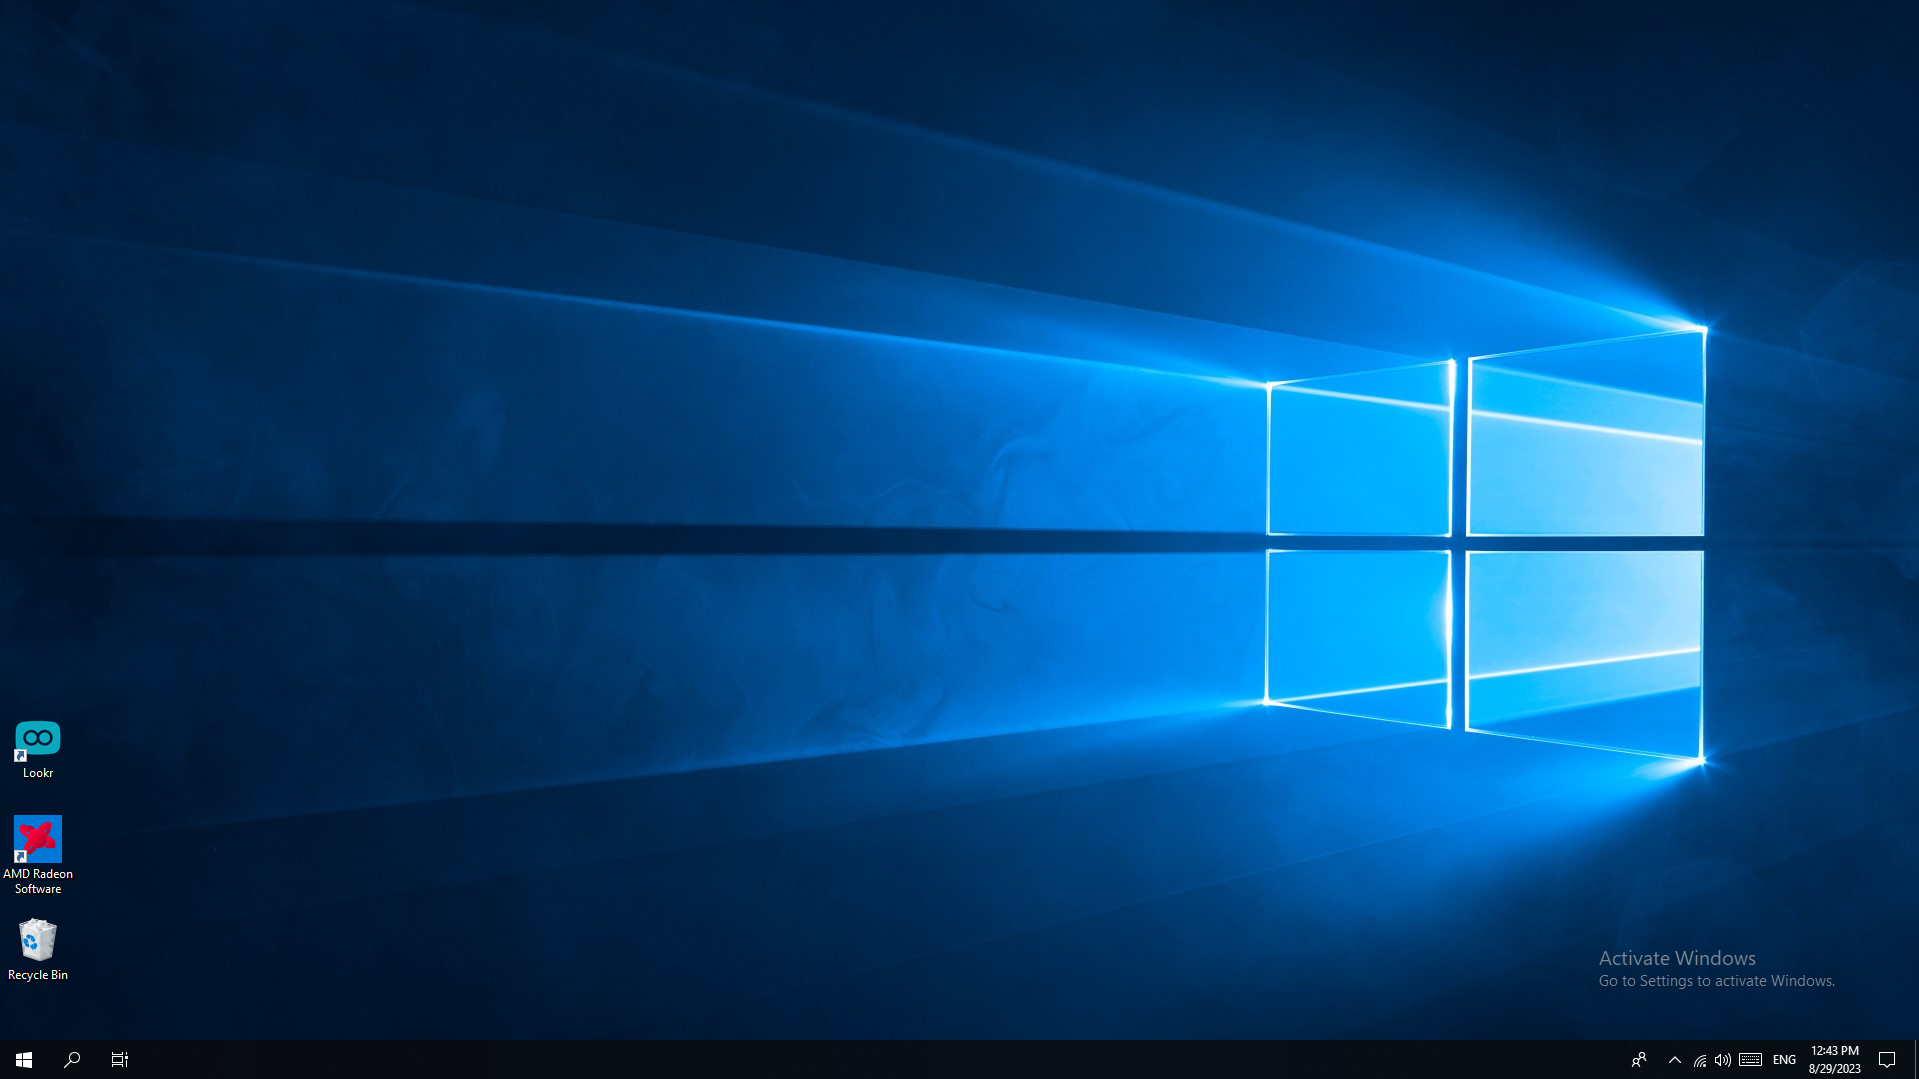
b. Recommend to create a shortcut on Windows Desktop for quick access it every time.
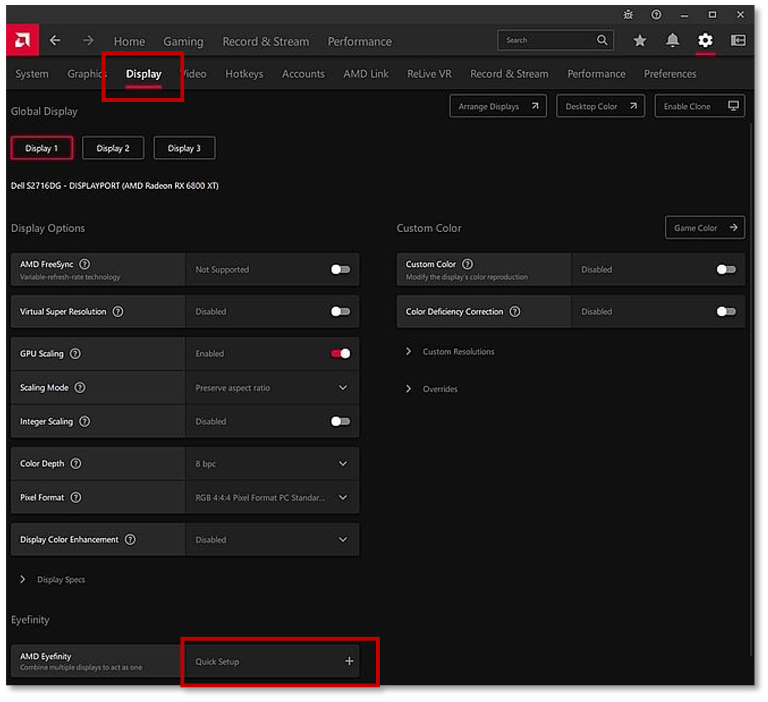
c. Find the "Eyefinity" > "Quick Setup" function on AMD Radeon Software (version may vary, provide two example screenshots as below)

d. After executing the "Quick Setup", a merged display will combine all the screens that have been connected to HDMI outputs.
Note: If the merged display is not arranged in the order that you want, you can click "Arrange Displays" to have advanced order settings. In Arrange Displays, click the box that corresponds to the display light in blue accordingly.
Check the following pictures for detailed steps of one of the possible examples:
1. A blue screen shows on the far left, click on the square that is on the far left in "Arrange Displays"
2. The next blue screen shows on the second from the left, click on the square that is second from the left in "Arrange Displays".


Advanced Setup
You may also use the "Advanced Setup" to do the detail setting. For more information please refer to AMD official site: https://www.amd.com/en/support/kb/faq/dh3-014#faq-Quick-Setup-
2. Lookr App Setup
2.1 Lookr Installation
STEP 1.
Download Lookr App
1. Get the installation file (.exe) from Kabob Cloud. URL: https://cloud.kabob.io/app_releases/download?app_id=1
Or, use your Kabob Account to log in to Kabob Cloud: https://cloud.kabob.io/

STEP 2.
Install And Bind The Account On The Device
Device Side

Web Console Side

4.. Name this device
5. Click "Activate" then done
The activated device will show on the "Control Center"
2.2 Create Template For Multi-Screen
STEP 1.
Create A Template
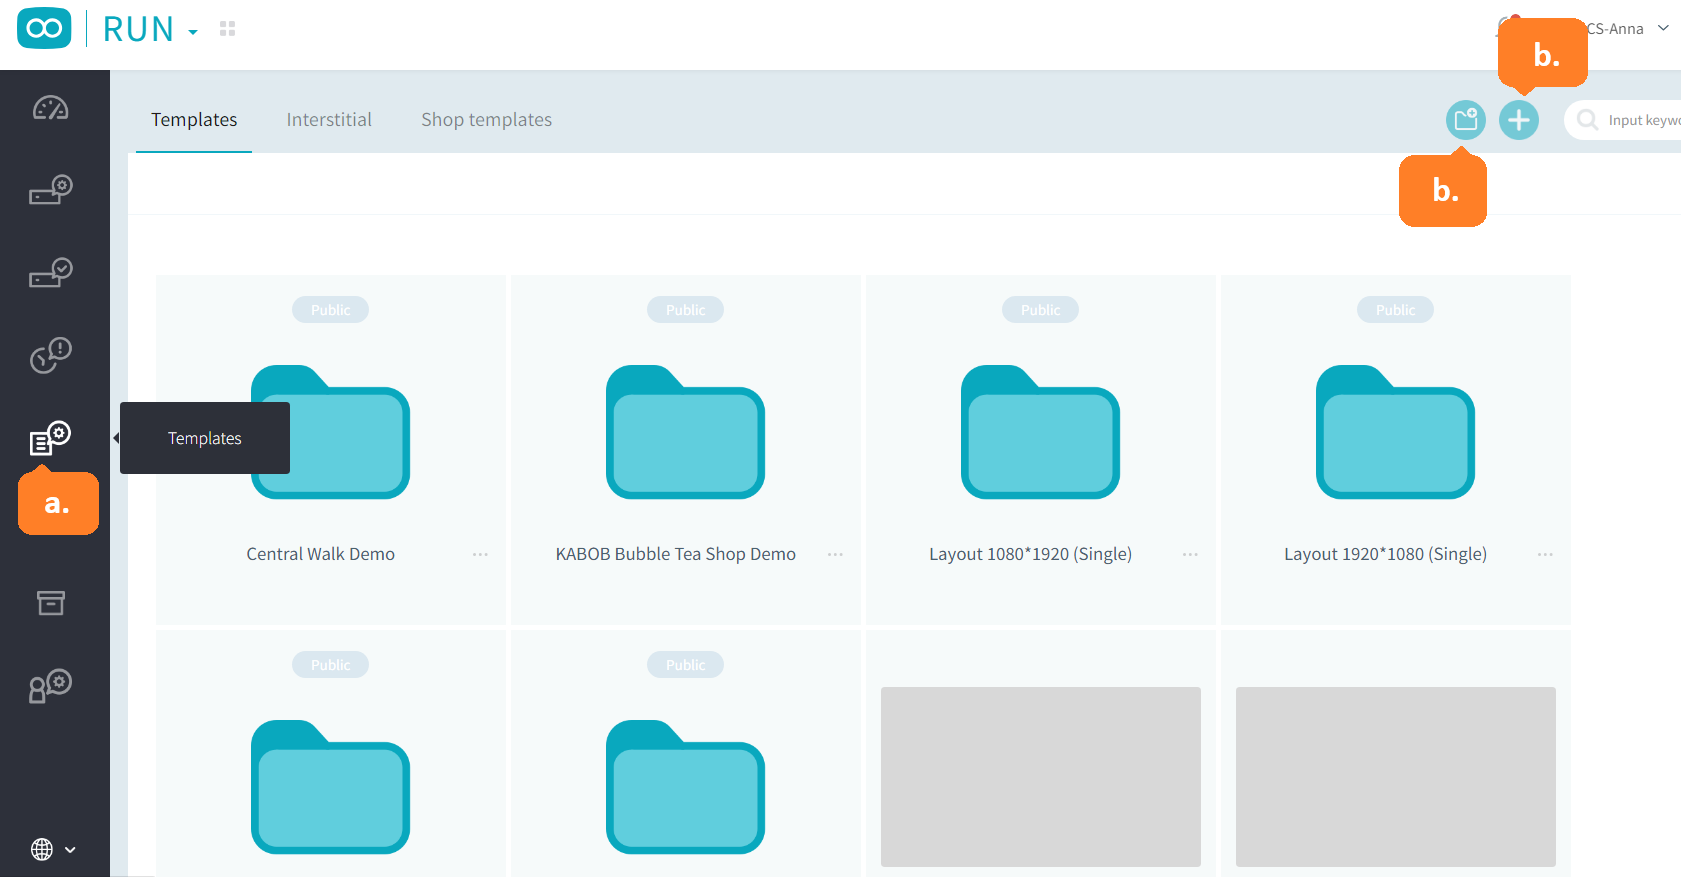
a. Enter "Template "
b. Create a folder for management or click "+" icon to create a new template

STEP 2.
Edit Template
a. Once the template has been created, click on that template to enter the edition page


2.3 Apply to Device
Click "Apply to Device" in the top-right corner of the template edit page


Was this article helpful?
That’s Great!
Thank you for your feedback
Sorry! We couldn't be helpful
Thank you for your feedback
Feedback sent
We appreciate your effort and will try to fix the article